


€0,00
Technologie
[SOLVED] Remove BIOS Passwords from HP EliteBook and ProBook Laptops
In this blog post I explain exactly how to remove a BIOS password from HP Laptops
How to remove BIOS passwords from HP EliteBook and HP ProBook laptops?
This is a very advanced method. Only try this if you have no other choice or if you like to know more about the workings of a computer.
We do not take any responsibility if this method does not work or in the worst case, destroys your laptop.
If for some reason you don't want to go through a long process or have too many laptops with a BIOS password, another option is to recycle the HP laptops. We buy all the electronic scrap regardless of the brands or conditions they are in.
Now for those of you that want to proceed, let's get started. As far as I experienced, this method works for every HP laptop up to the 7th generation and maybe even higher.
If you have a first, second or older generation, please try a tool developed by Mazzif before you use this method. You can download the tool here
Tools you need to remove a HP BIOS password
- The most important tool is a USB ISP programmer. For HP we use the EZP2019 which works on all the HP models.
- Second you need a desoldering station to remove the chip from the motherboard. You can use a SOIC 8 clip in some cases but we stopped using it because it's not reliable.
- A program to remove the BIOS password which you can freely download here
Recommeded tools are:
- A microscope, the one we use is a Hayear microscope. I know there are much better microscopes but they are often very expensive and this one does do the job just fine.
- Some tweazers to take of the chip itself.
- Although soldering can be done without flux, it is recommended to use. Amtech flux is the best flux on the market, although pretty expensive.
Steps to remove the BIOS password
- Locate the BIOS chip
- Remove the BIOS chip from the motherboard
- Read the chip with the USB ISP programmer
- Use the HP BIOS unlock tool to remove the password
- Re-program the chip
- Solder the chip back on the motherboard
Are you excited to learn something about a laptop BIOS? Let's get started!
Read this tutorial or watch the video on YouTube:
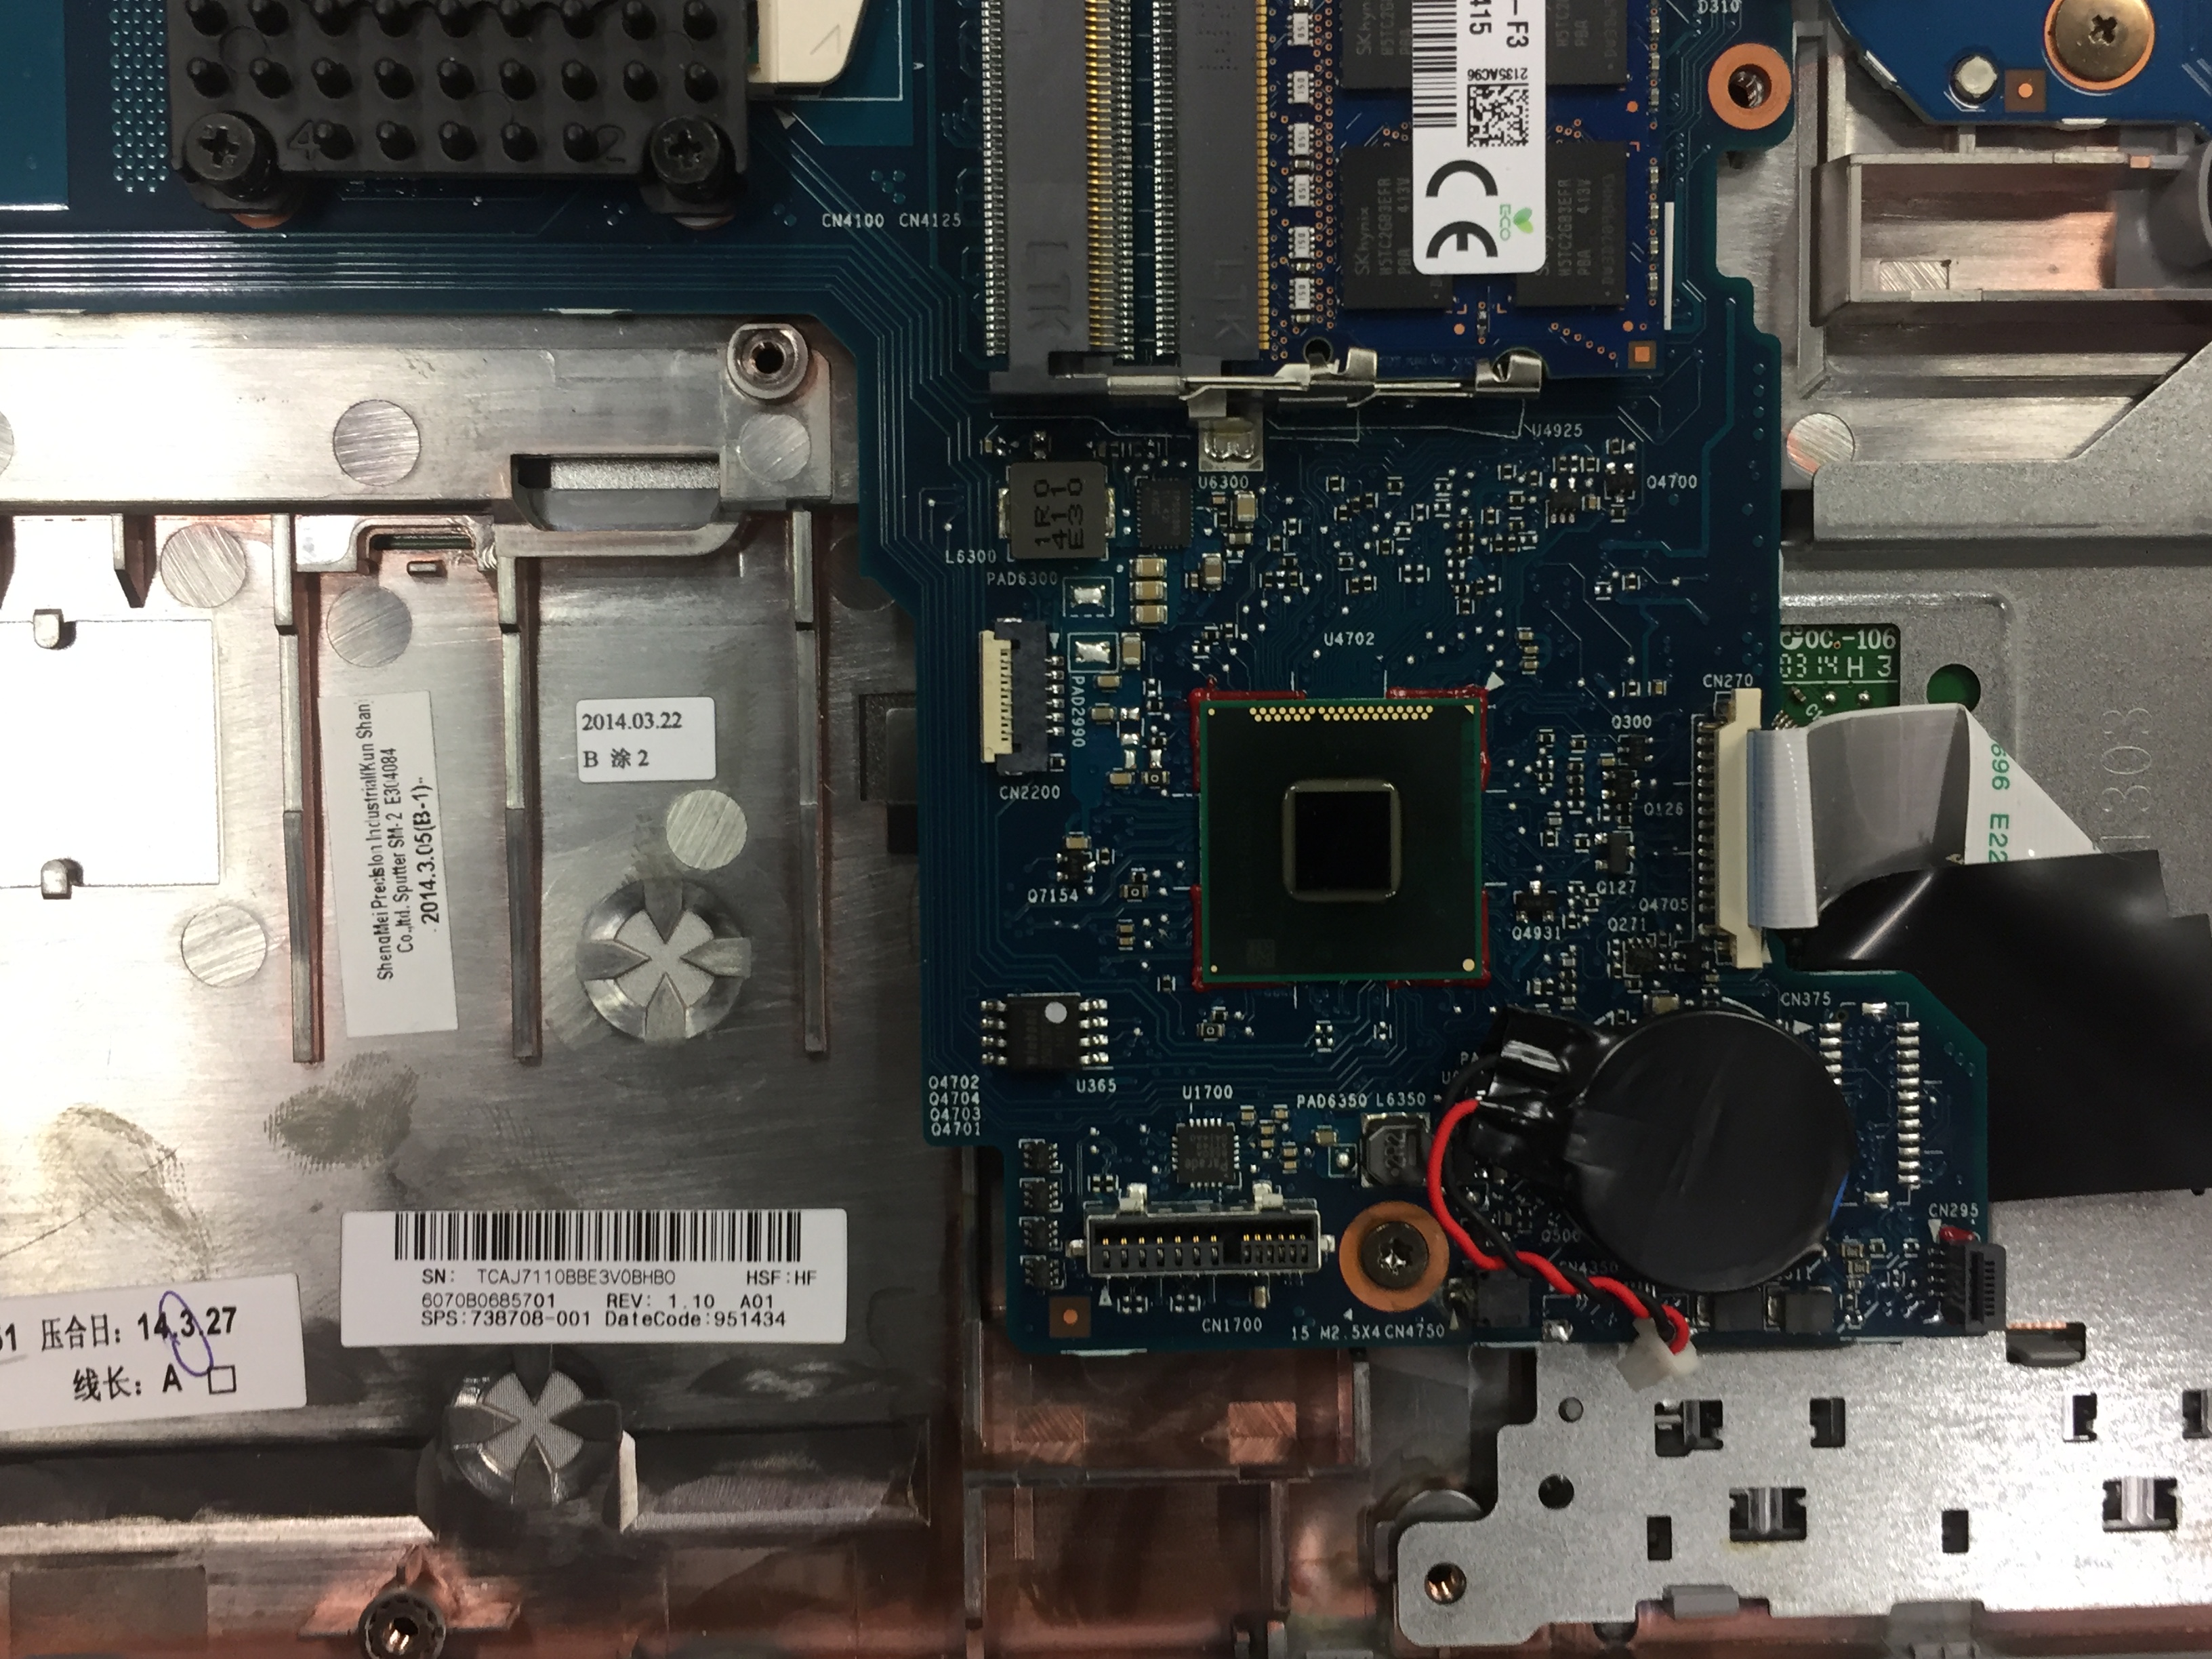
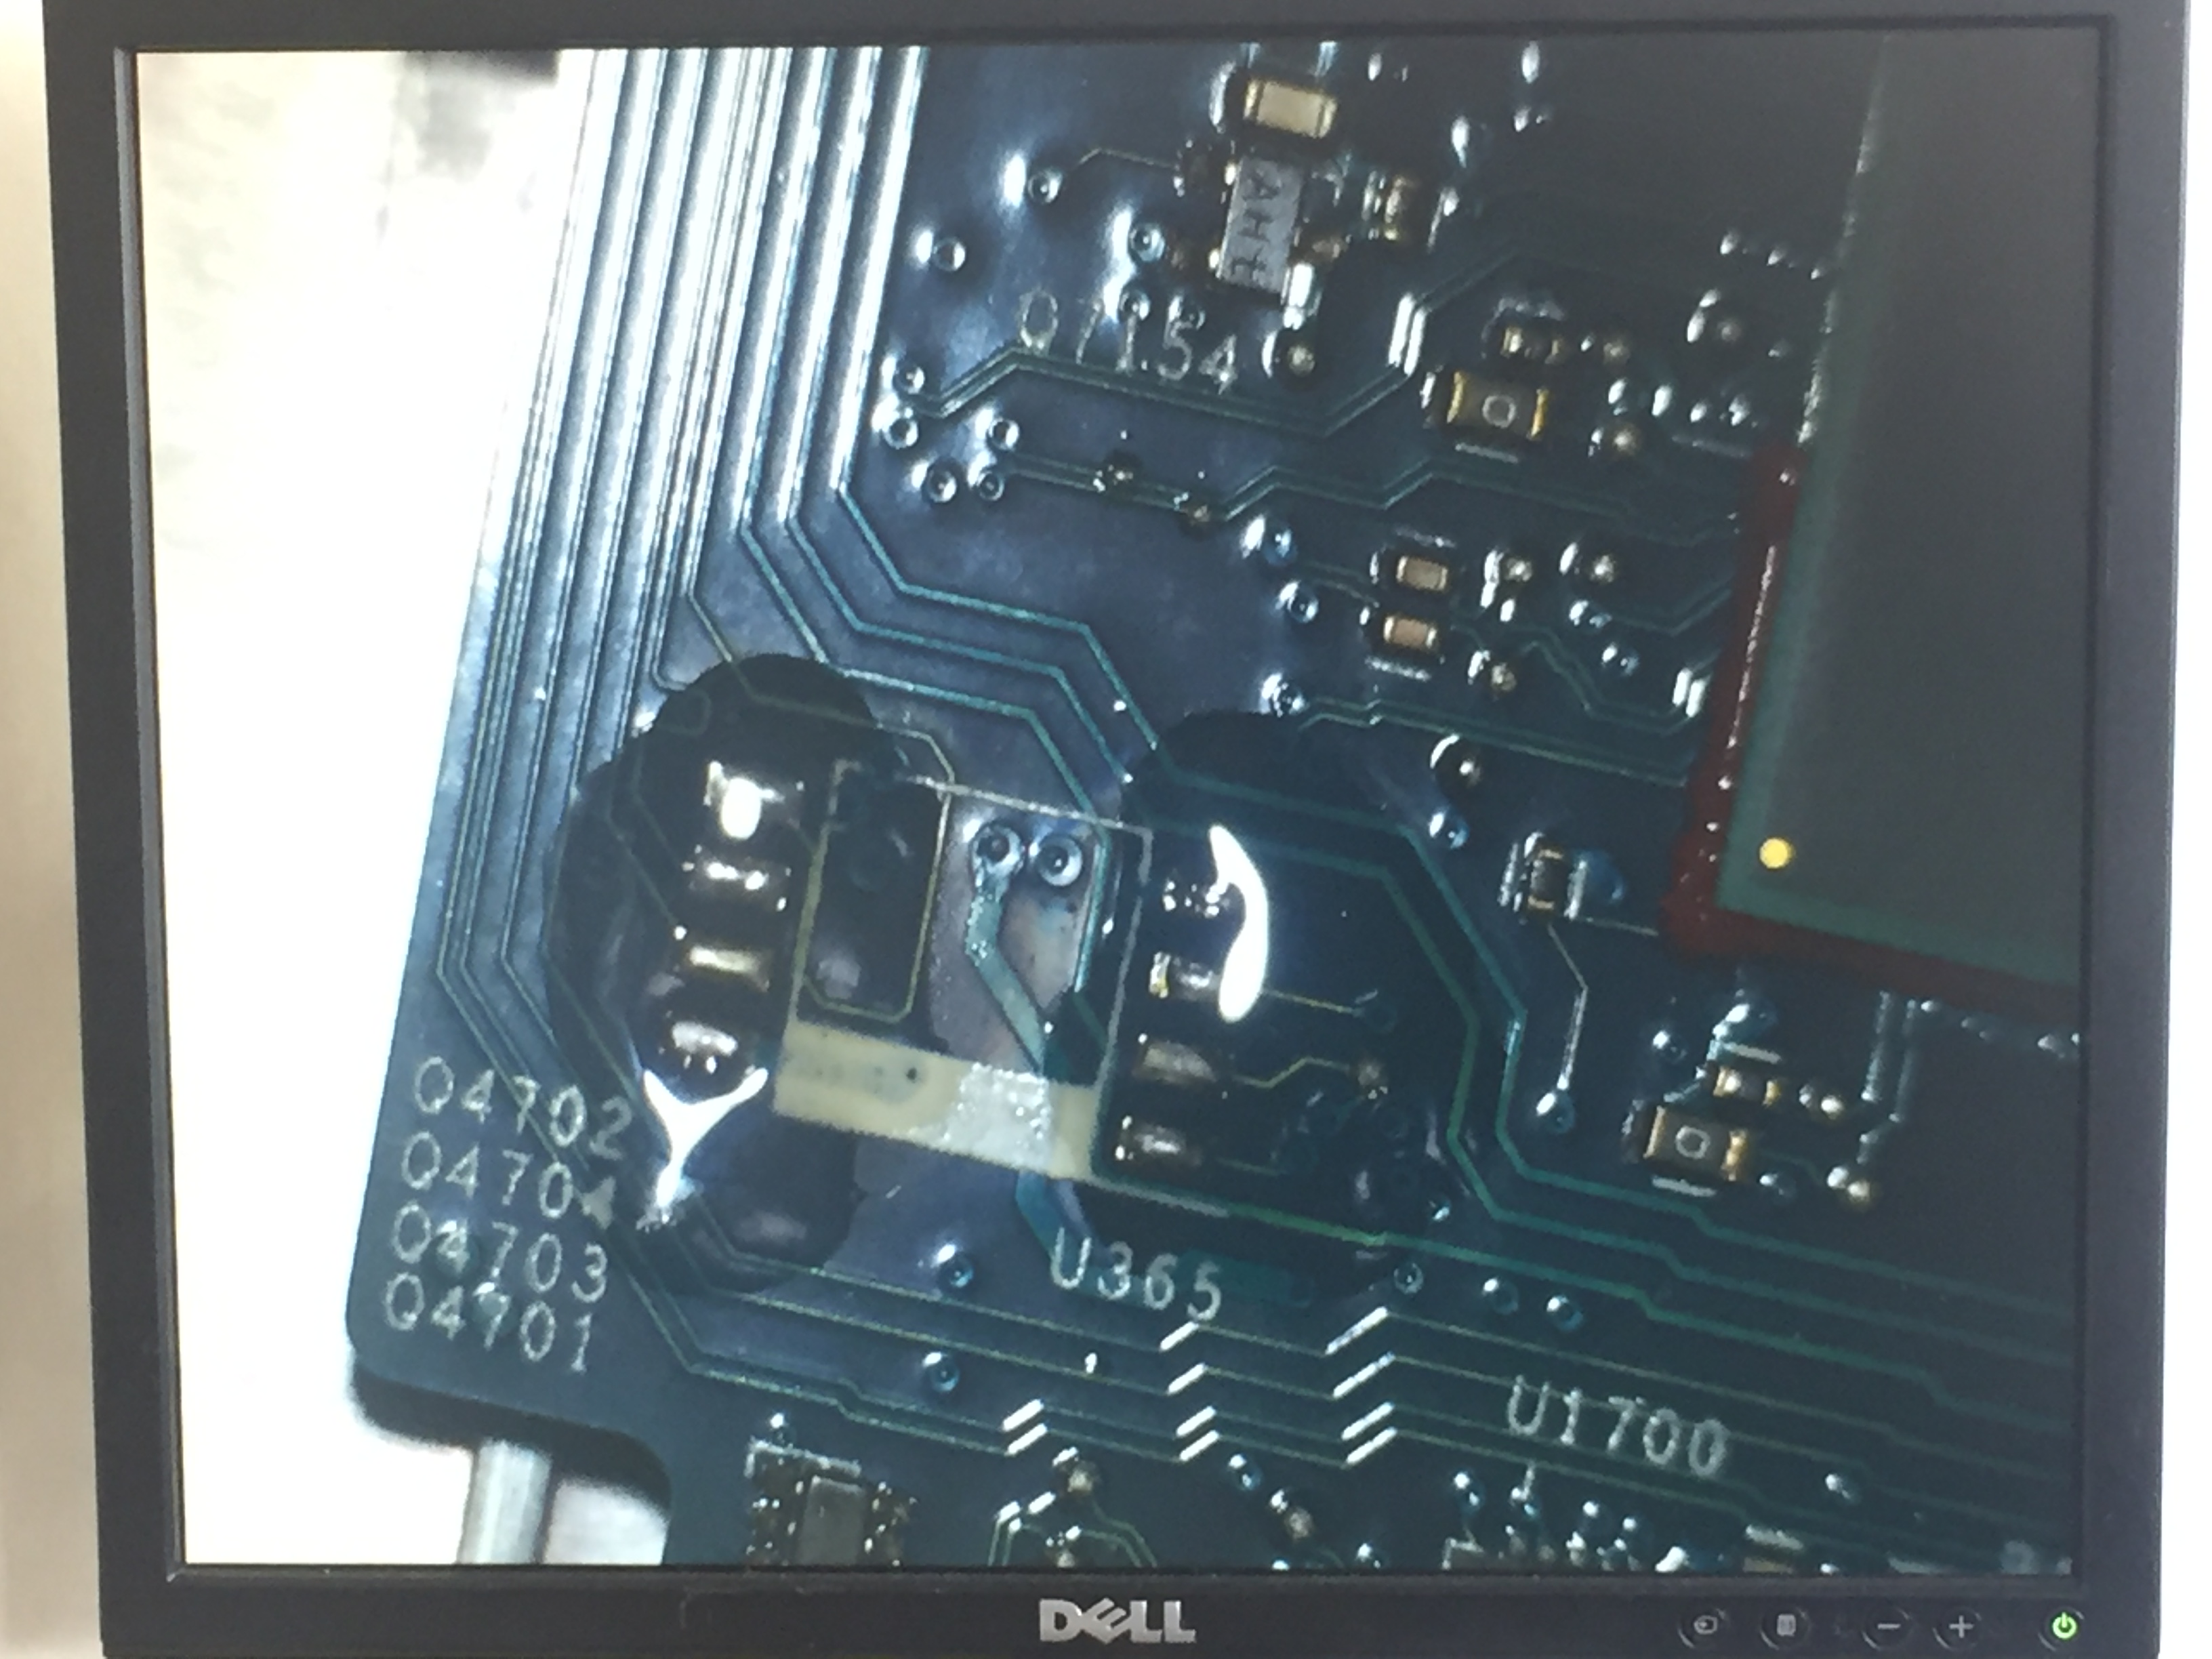
Locate the BIOS chip
On every motherboard the BIOS chip is located in a different place. A good place to start is to see if you can find the BIOS battery. The BIOS chip itself is always located near the battery.
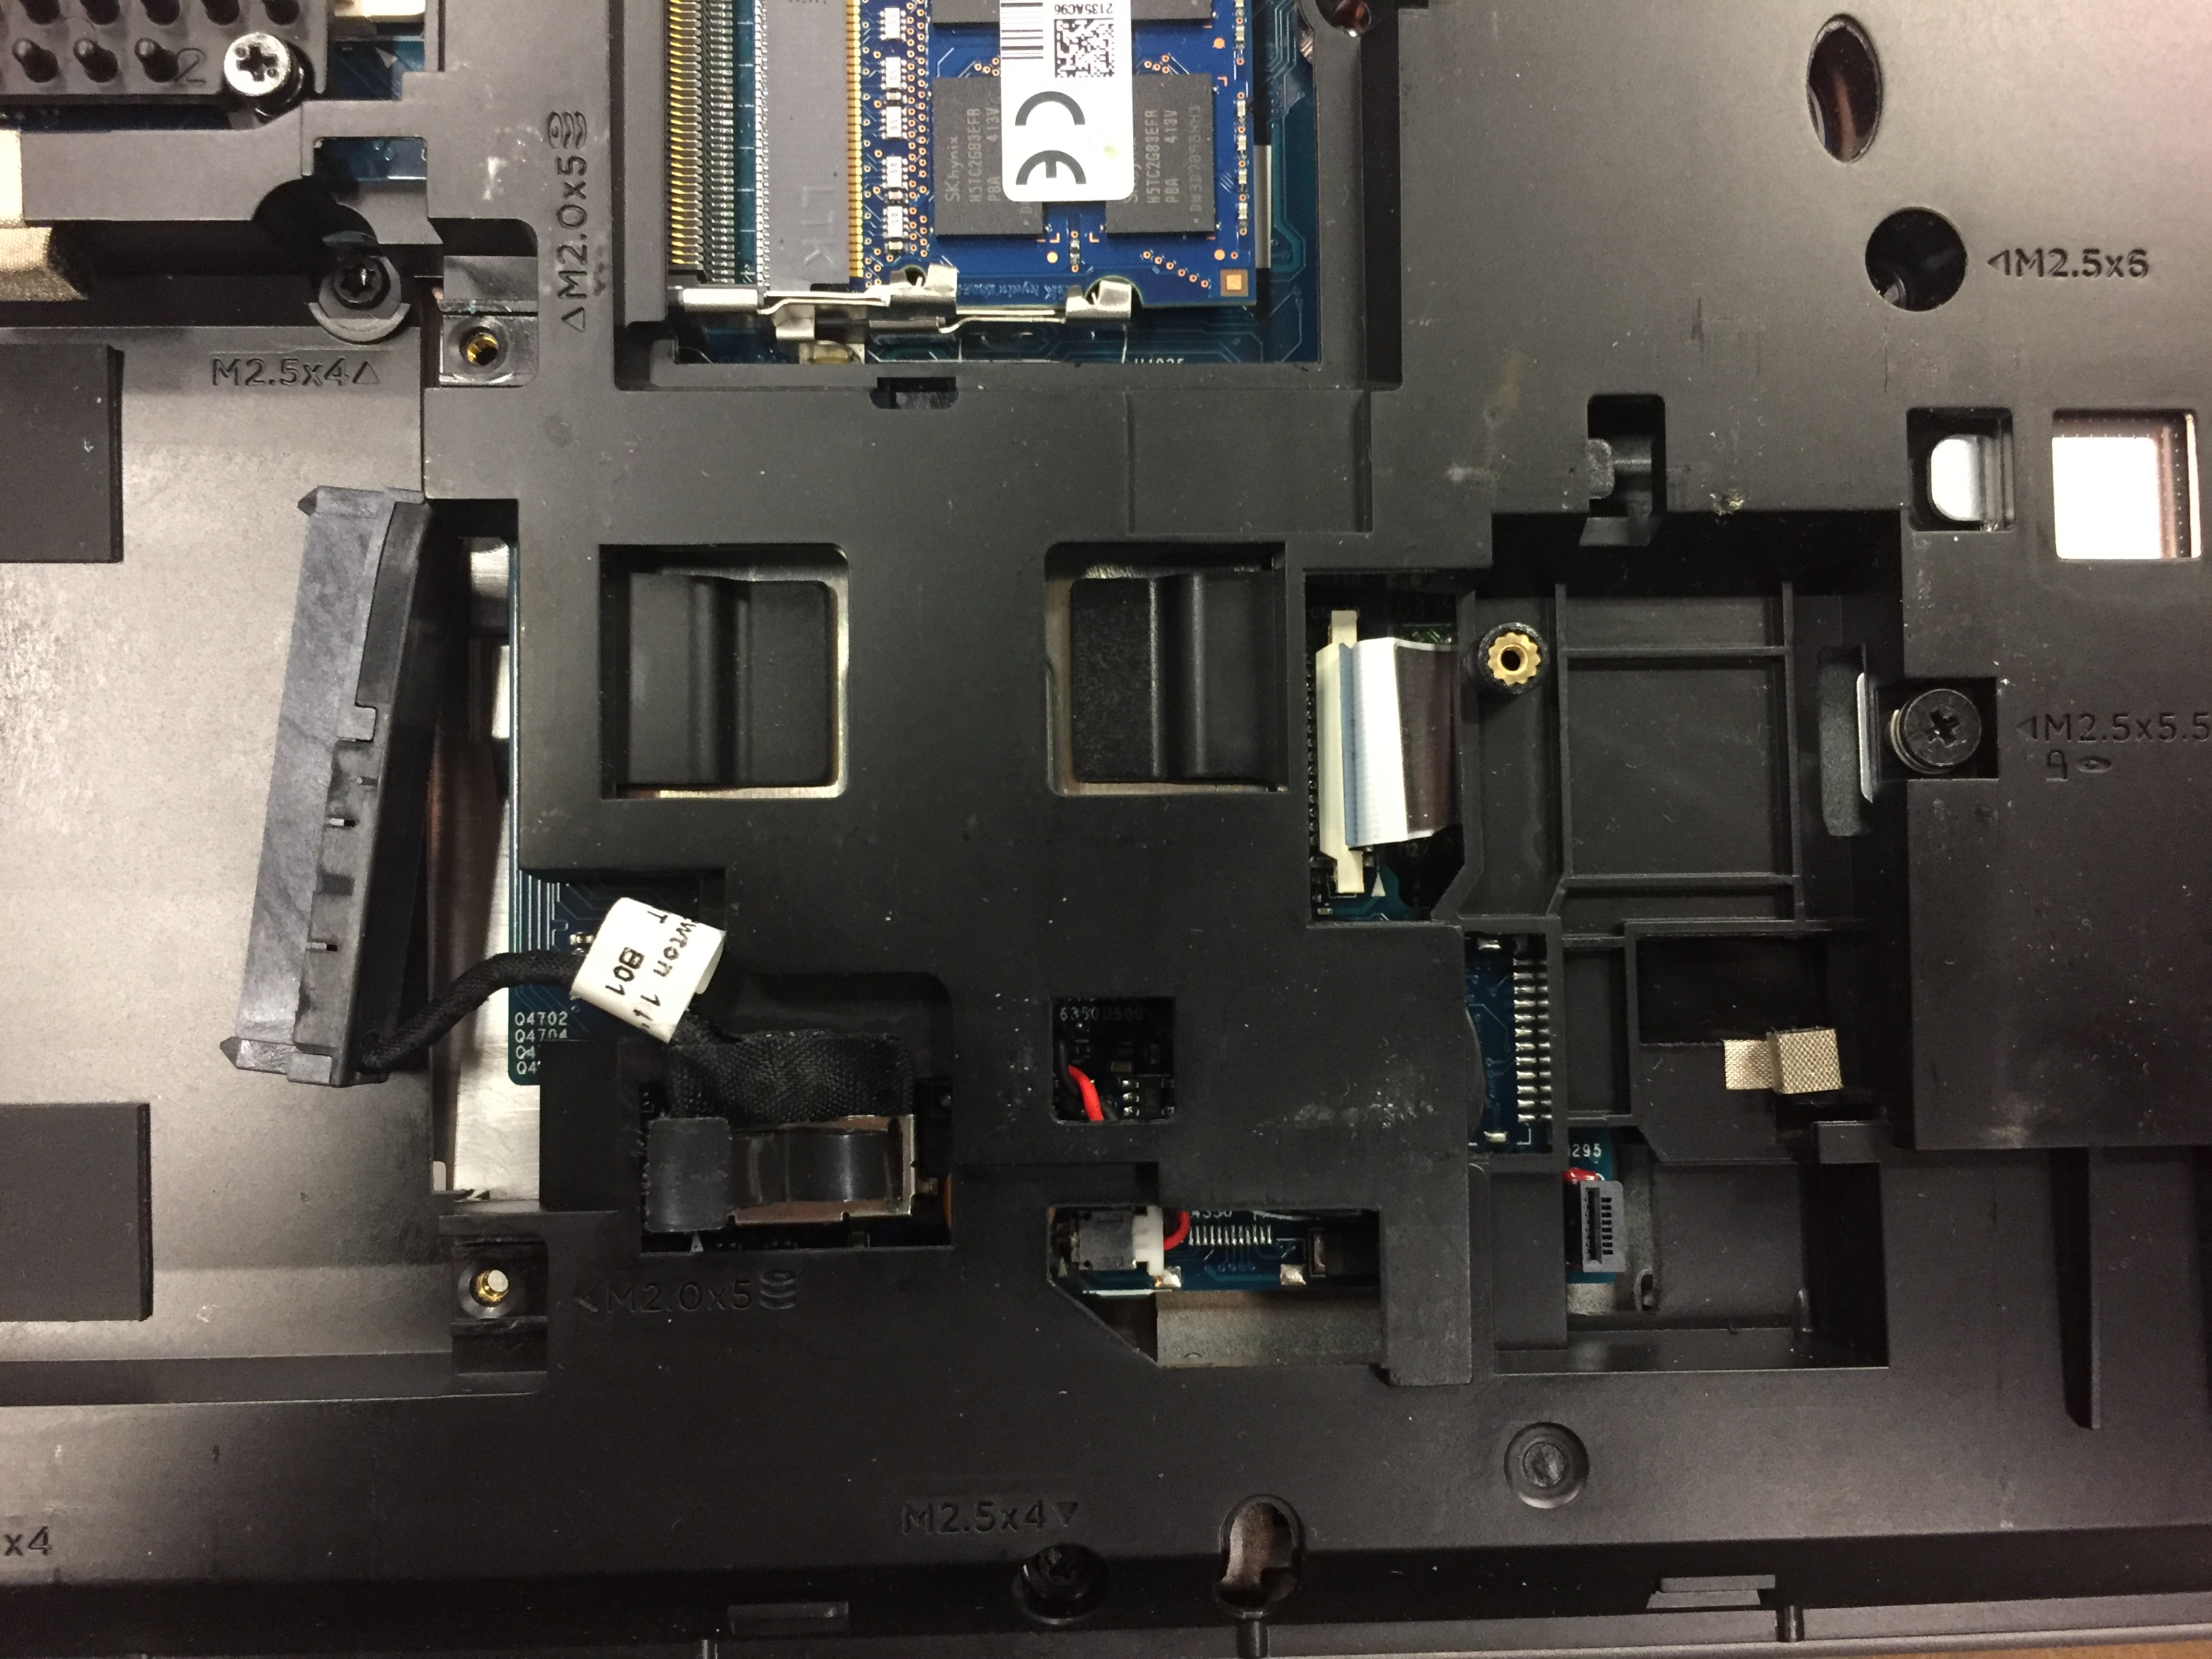
The reason you need to locate the BIOS chip is so that you don't need to disassemble the entire laptop.
This is a HP ProBook 650 G1 where only the bottom case has to be removed to get to the BIOS chip.
If you are unable to locate the BIOS chip, you have to disassemble the laptop bit by bit until you have sufficient room to desolder it.
Remove the BIOS battery
Whenever you locate the BIOS chip, remove the battery as soon as possible. This is a very important step and I know that this might be forgotten later on.
Remove the BIOS chip from the motherboard
As soon as you have located the chip, removed the BIOS battery, you can start removing the chip itself.
This can be a bit tricky at first so I recommend starting with some chips from an old unused electronics board. When you get the feeling for it you will be ready to remove the chip from the motherboard.
Using hot air to desolder the chip
This is the easiest way to desolder the chip but be careful because there is a possibility you burn the chip which make it unusable.
Start with a small nozzle on you hot air gun and put the temperature on 400 degrees celcius. We always set the temperature on 480 degrees so the chip will be detached very quick but this can also be dangerous when you don't know exactly what you are doing.
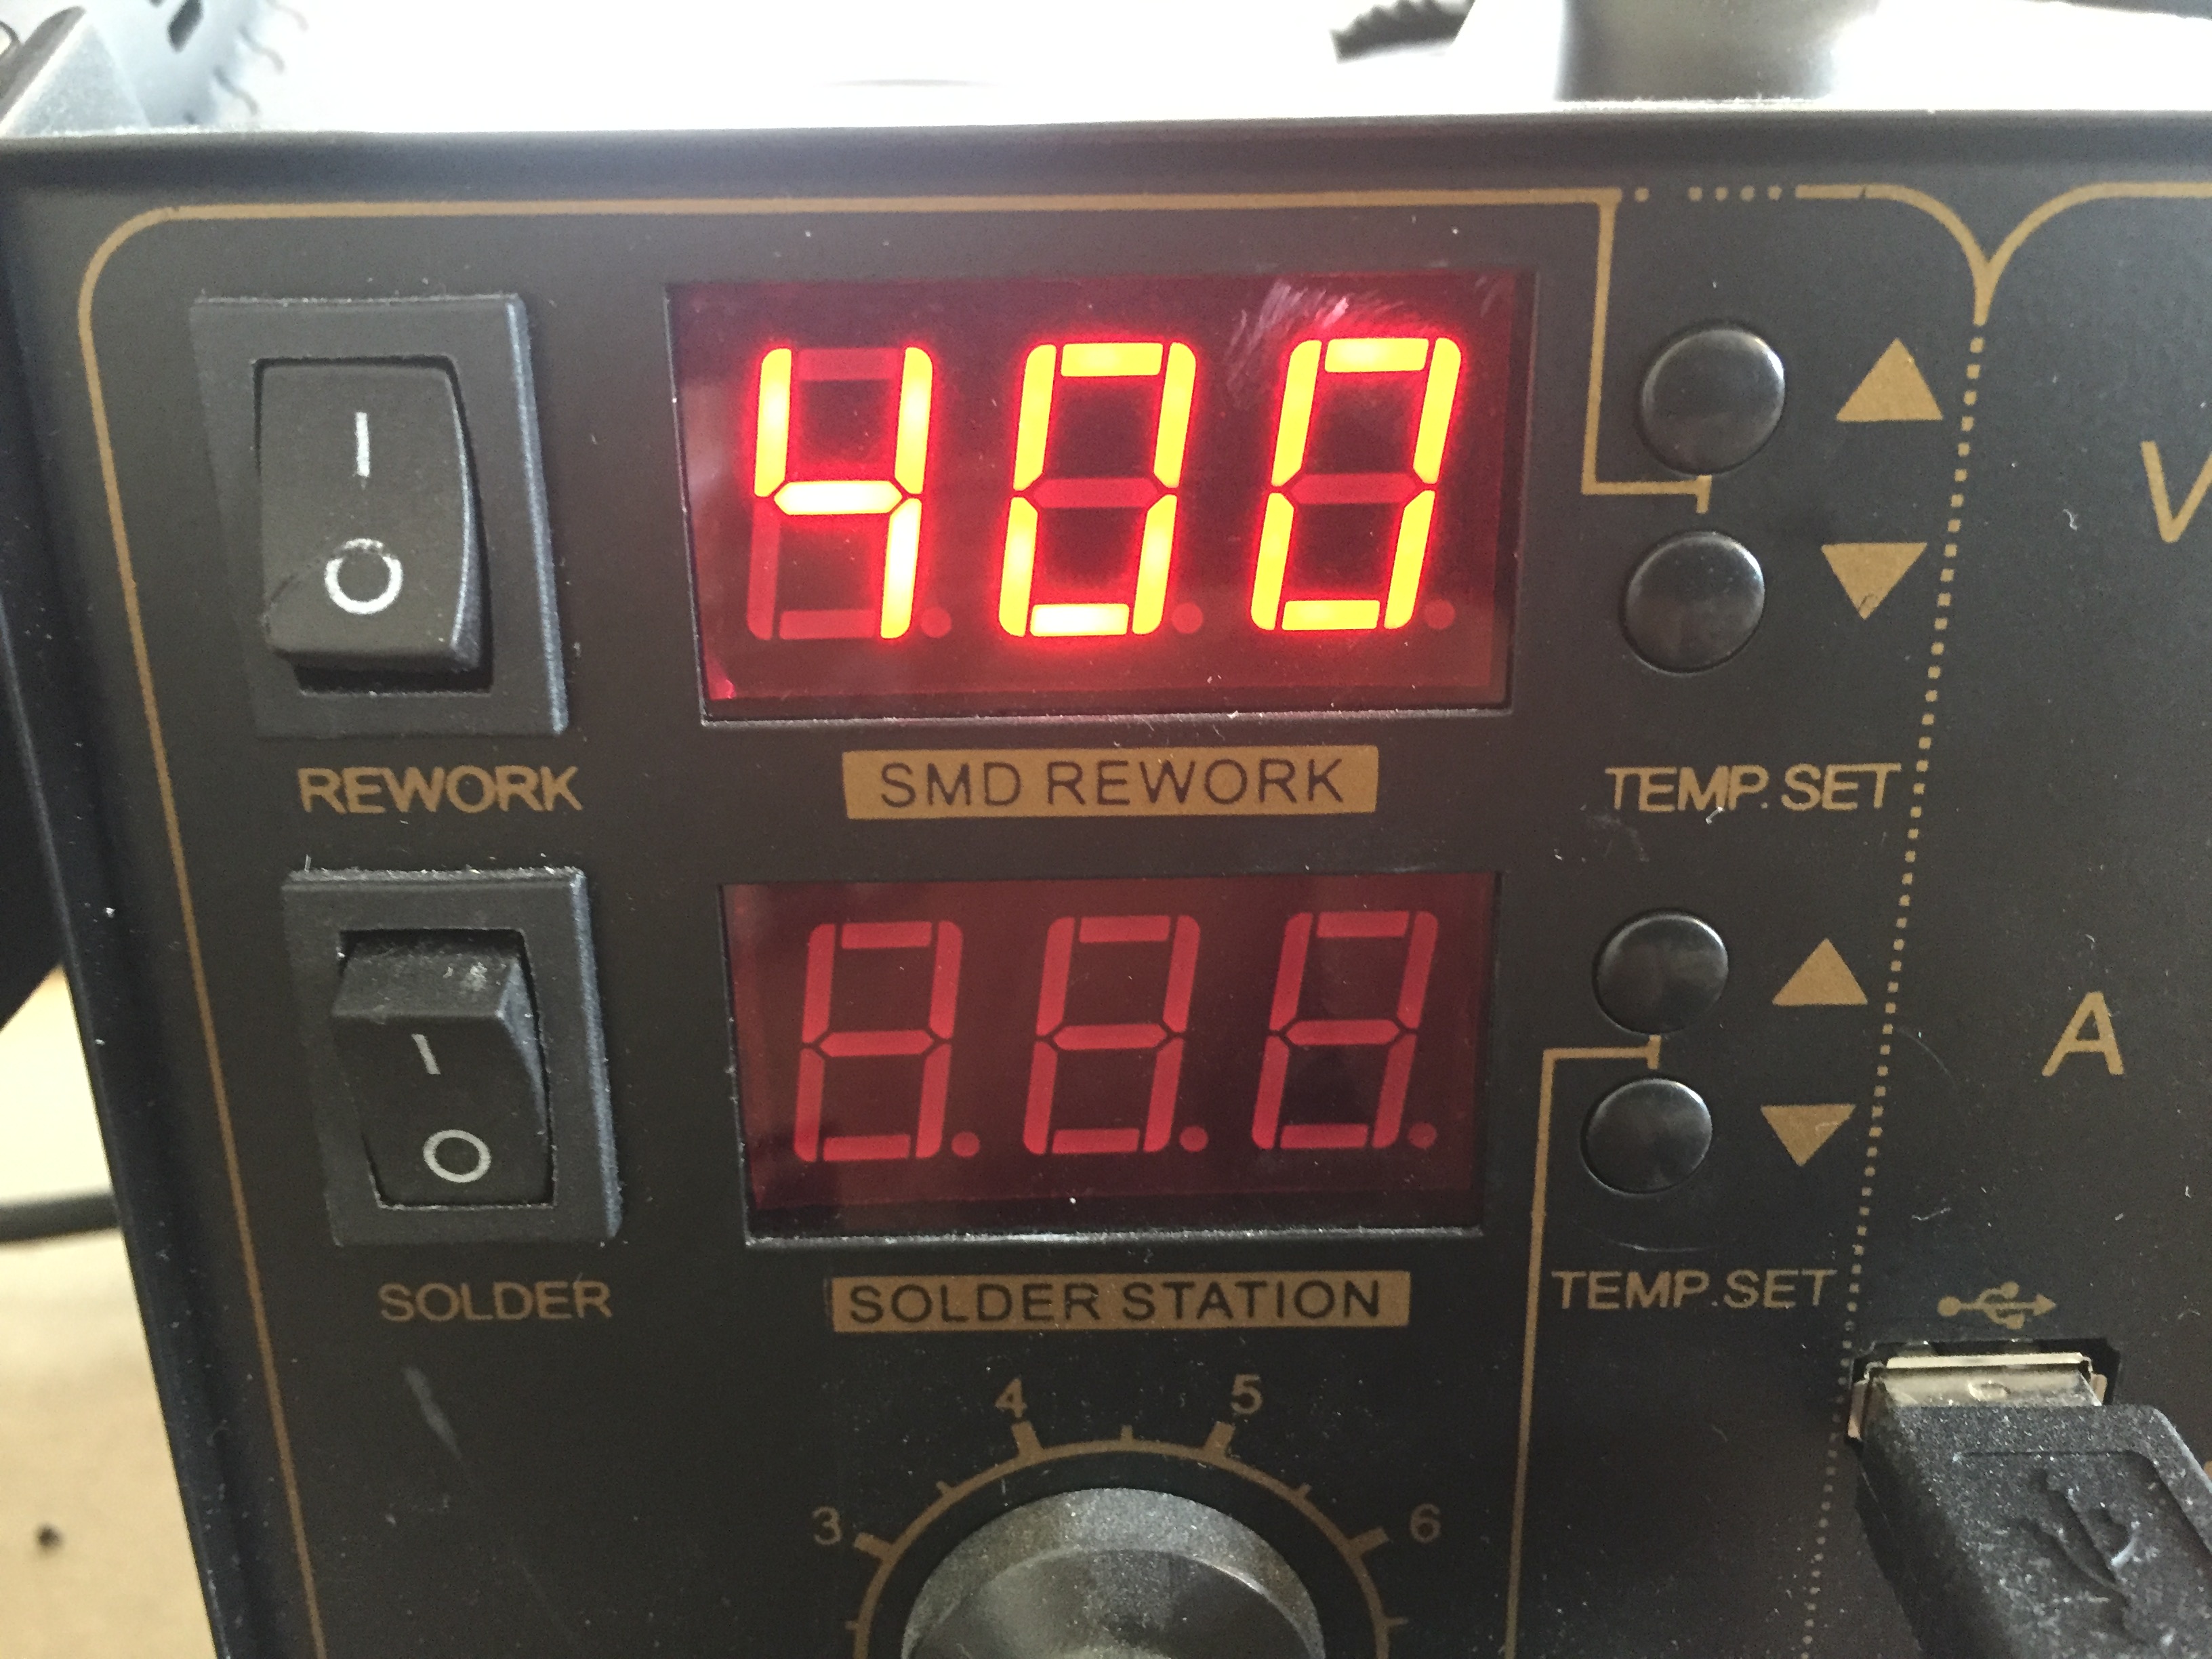
So turn the heat gun on 400 degrees celcius and put the air flow as high as possible.
Now take the tweezers or some small gripper so that you can take of the BIOS chip. Hold the tweezer ready but don't touch the BIOS chip with it.
The reason for this is that the heat will transfer into the tweezers which makes it harder for the solder to become liquid.
Blow the hot air onto the legs of the chip but avoid blowing hot air straight onto the chip, this can burn the chip and you will have to order another chip to repair the laptop.
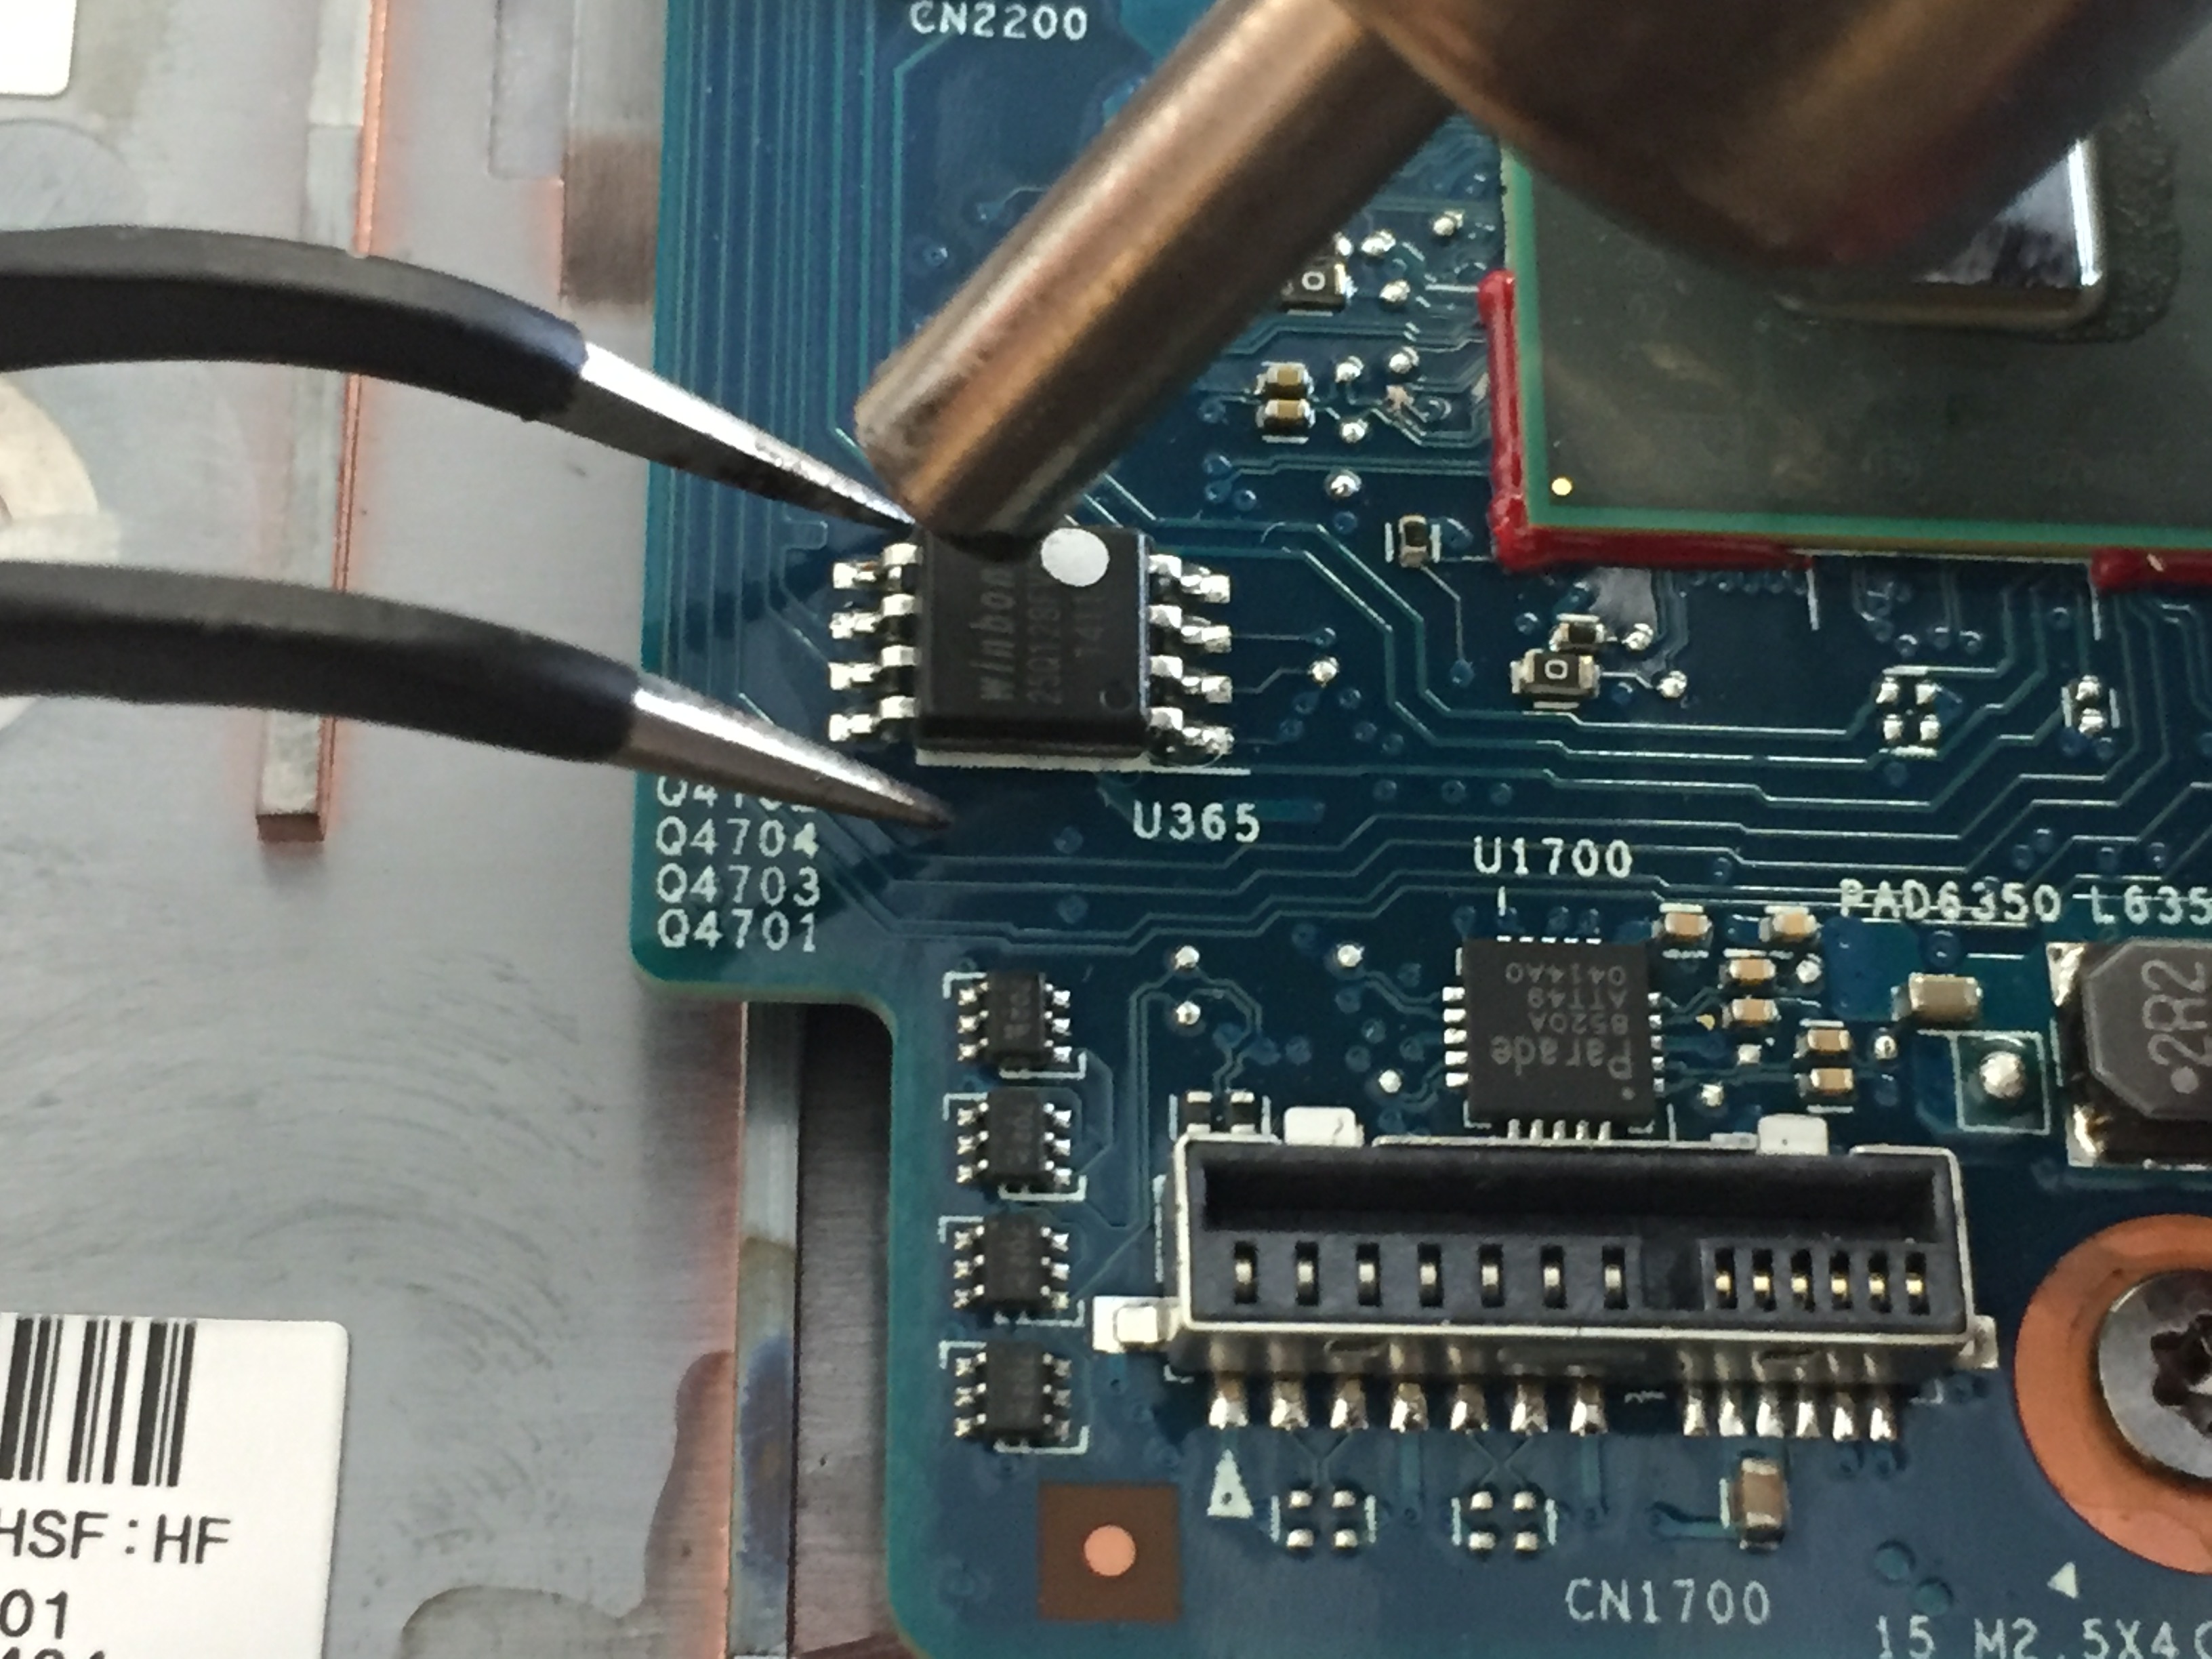
Blow air onto the legs on both sides and swing back and forth over the 8 legs of the chip while in the meantime you grab the chip and pull a little bit to see if it is loose.
You do not have to pull hard.
When the solder is liquid the chip will come off without any effort. When you start pulling hard, the legs can break or bend.
Now that you have pulled off the BIOS chip you can start programming it with the USB ISP programmer. In our case the EZP2019.
Read the chip with the USB ISP programmer
Insert the chip into the socket of the bracket. Make sure that PIN 1 of the chip matches PIN 1 of the programmer. PIN 1 on the chip is notated with a small dot in the corner on the top of the chip.

Now startup the software from the EZP2019. This should be included on a small DVD with the programmer itself.
After the program is started you can insert the programmer into the USB of the computer. You should here a small beep that the programmer is detected along with the chip inside the programmer.
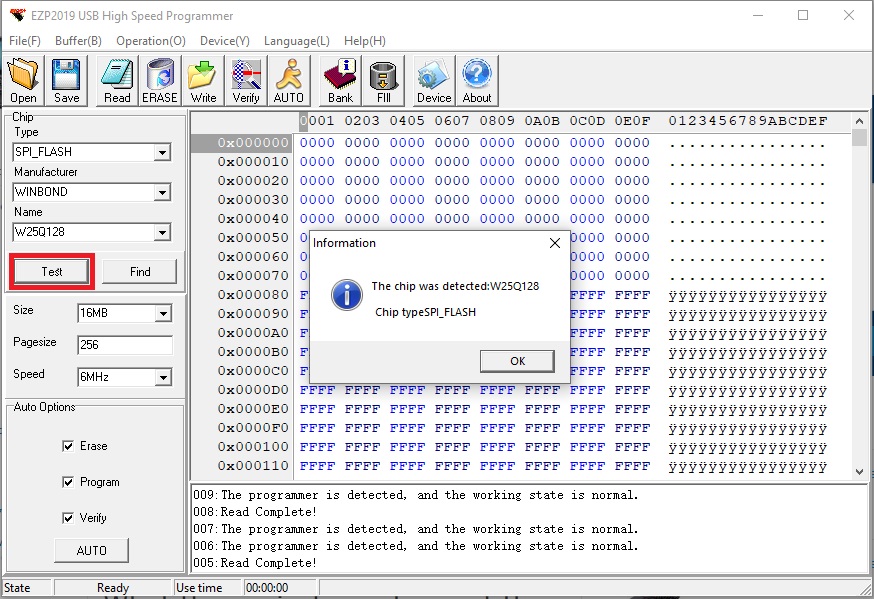
Press "Test" inside the EZP2019 programmer utility.
You should see a popup that the chip is detected. If it did not detected the chip in the first try, try some a couple of times until you see the chip ID.
If this does not work then pull the USB out of the computer and place the chip again. Try to read the ID again.
If you are having trouble reading the chip ID it might be that the chip is not functional anymore but the only way to figure this out is to keep trying different approaches.
This is where you learn how chips work and there is not one fits all solution here.
There is no point in reading the chip when the ID is not detected. You might read some information but programming it will probably not work although the software might say it finished succesfully.
After you have detected the chip ID press "Read" to read the content on the chip. This can take a while.
After you have successfully read the chip, save the .BIN file on the computer.
Use the HP BIOS unlock tool to remove the password
Download the HP BIOS unlock tool and save it on your computer somewhere in a directory inside your C drive, when you save it inside Documents it will not always work.
Now click on your .BIN file and drag it on the unlock file. Drop the file on top of the unlock file and if everything works, there will be a file create in the same directory named xxxxxx_unlocked.BIN.
Load this file with the "Open" button on your programmer software. Your programmer should still be attached to the computer.
Now press "Test" again to be sure that the programmer still can read the chip.
Re-program the chip
After you have successfully created the xxxxxx_unlocked.BIN its time to re-program the chip.
press AUTO inside the software so that the chip will be erased, checked and reprogrammed.
Again this can take a while but you should see a notification with AUTO Complete!
Solder the chip back on the motherboard
When the chip is re-programmed with the unlocked BIOS you can solder it back onto the motherboard.
You can do it with the hot air as well as with the iron but we recommend using the iron for the job.
To be save put it on 250 degrees Celsius so you will not burn the chip. Take the time and be careful you will not rip of the pads.
Put some flux onto the left over solder that is still on the motherboard.
Put a small piece of solder onto the iron and make the pats on the motherboard look nice again so that it will hold the chip well.

Put the chip on the fresh soldered pats and make sure that PIN 1 matches on the motherboard.
After the chip is put into place hold it with the tweezers and put a small bit of solder onto 1 of the pins so that it sticks onto the motherboard.
Then push onto the chip and solder all the legs of the chip. Due to the flux your solder should flow nicely and merge the legs with the motherboard.
Inspect everything closely to see if the legs are attached to the motherboard.
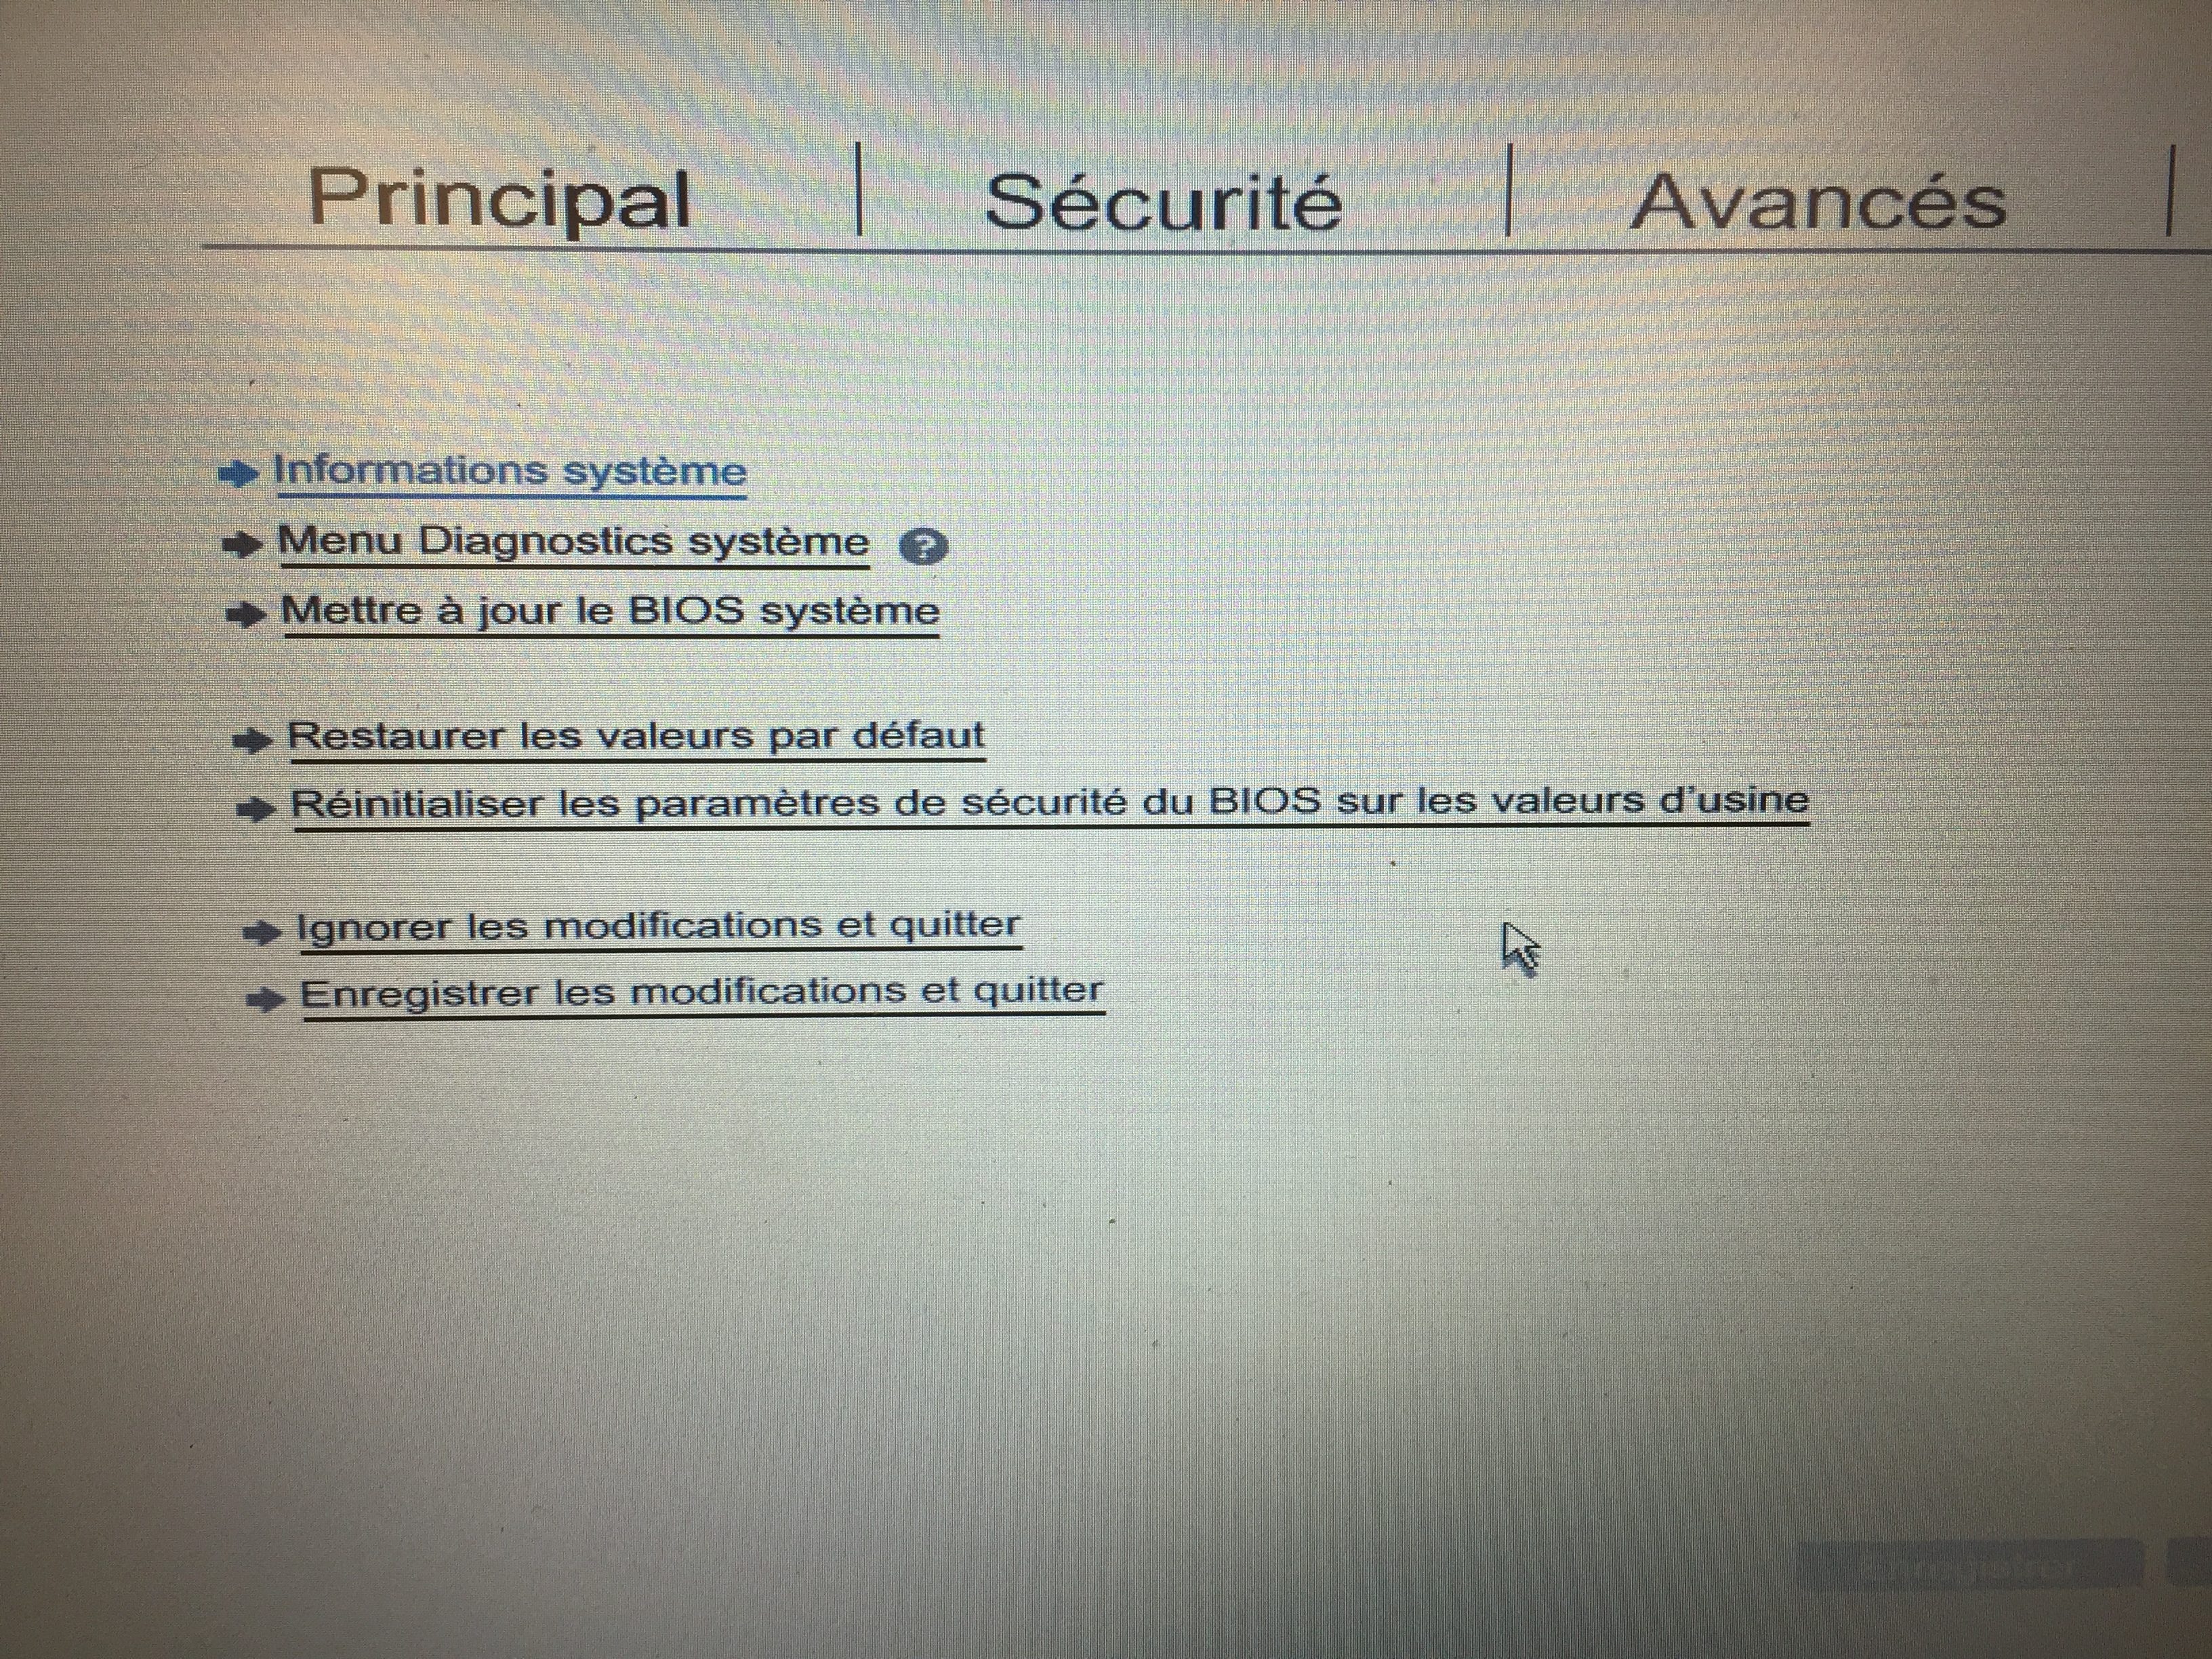
Before you assemble the entire laptop, put just enough back to boot the laptop and check if the password is removed.
If the password is still on there, try doing the steps described again.
If everything went well, you should be able to enter the BIOS without any password input.
Congratualations!
You have now successfully removed a HP BIOS password.
If you are looking for technical expertise regarding hardware, the recycling of hardware or have any other questions, feel free to contact us.
© Data Impact. Alle rechten voorbehouden.


